| HOME | Outfitting Guenevere | Contact
us |
Our DVDs |
Video Shorts |
| Short
Hops (Local Bay area cruises) |
Our Plans and Tracking | Our Position
Reports with photos |
Guenevere's Reading Room |
Links we like |
Keep it COOL!
(Note: You can click on any photo for a larger view. Then use your browsers back button to get back to this page.)
For a long time my wife Jill and I have been undecided about how we were going to handle a cold box aboard our Nor'Sea 27, Guenevere. For most of the time we have felt that a refrigerator was not needed. As a matter of fact, we spent two years with NO refrigeration at all. We did pick up a small (supermarket) block of ice once in a while. But that was not the norm for us. We were surprised to find that refrigeration was not all that difficult to do without!
But, it was always a treat to have something cold on one of those really hot days.
We went out and looked at all the systems at the local boat shows. At each booth we priced the products and reviewed the specs. But it was still very hard to choose one system that would work for us.
Then, about two years ago we were at the West Marine bargain store in Oakland. It's a back room store that all of the West Marine stores send all the damaged, broken, or unwanted items to be sold at rock bottom prices. We saw a new in the box Norcold Portable AC/DC Refrigerator/Freezer (West 2001 Master Catalog page 801). This unit normally sells for $879.99.
The box it was in had been crushed on one side. I took the unit out, and it looked as if the metal back had been bent badly. You could not plug it in, but, I did not see any damage to any of the vital parts. I offered $50.00 and the salesman countered at $250.00. After a bit we settled on $125.00, and if it would not run I could return it for a full refund. It ran just fine! After I beat the dents out of the metal with a 2 by 4. We used it for about 2 years as just a freezer in the aft cabin. As we did not pay full price and it was “Pre-dented” I didn't feel bad about moving it about as required. We also felt that when (not if) it went belly-up, we could just give it a toss.
Then a short time ago, an idea came to me. Why not mount this ready-made unit in place of our old ice box?
That started a plan forming.
If I put this unit in, it would be a freezer when needed. It would
be refrigerator when needed by just turning down the control (using
less total power in the process). And, it could be taken out and
dumped when it died, but still be built in. We decided that when we
are using the main unit as a freezer, we could use a couple of soft
sided coolers that we have as an icebox.
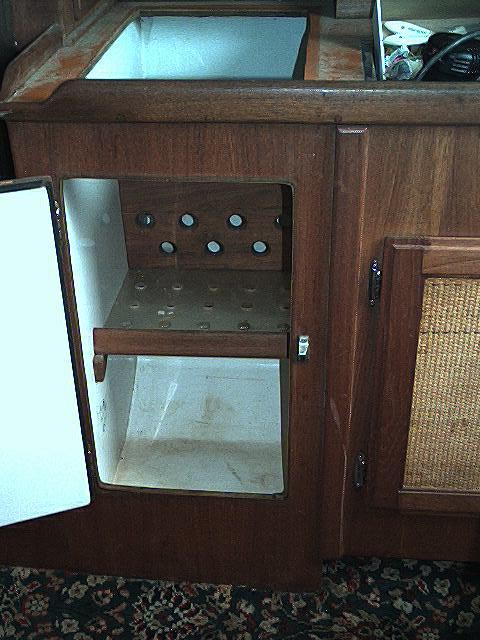
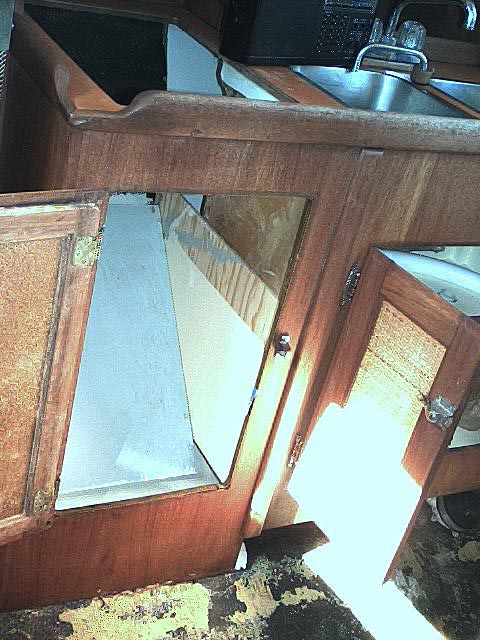
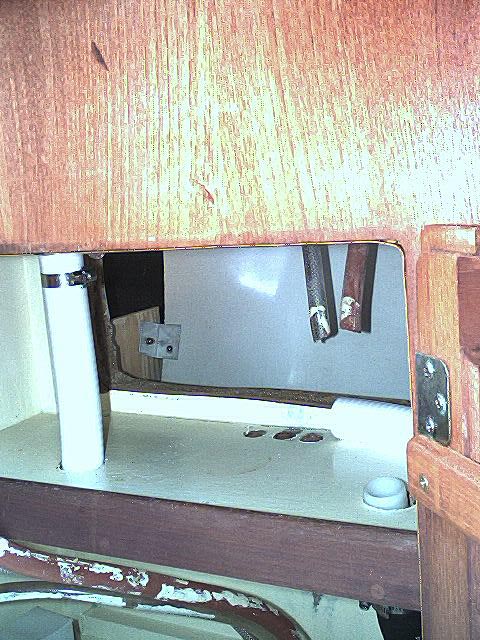
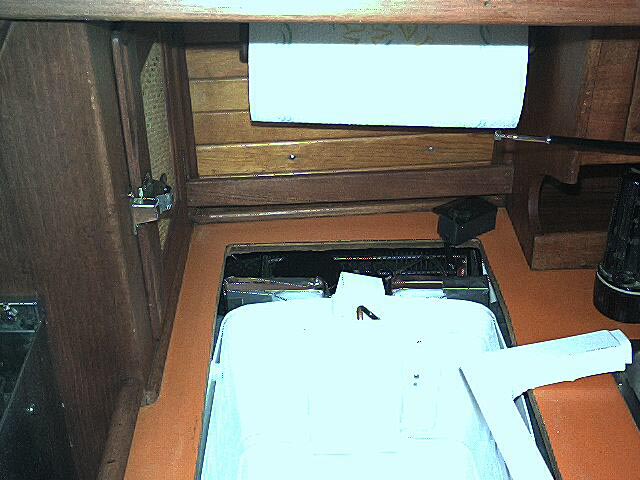
This is how the ice box looked to start.
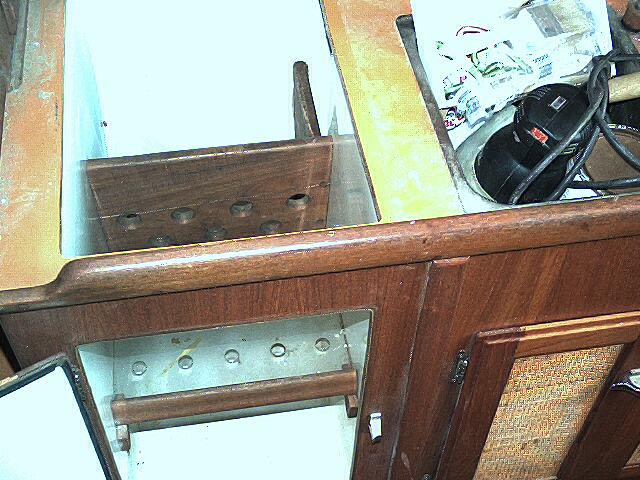
Here is a top view of the old ice box.
First I cut out the main part of the old icebox. In a Nor’Sea 27
part of the ice box extends behind the galley sink and it used to
store the block ice out of the way of the actual food in the box. I
did not remove this section. To do the removal I used a Roto-Zip and
a Skill saw.
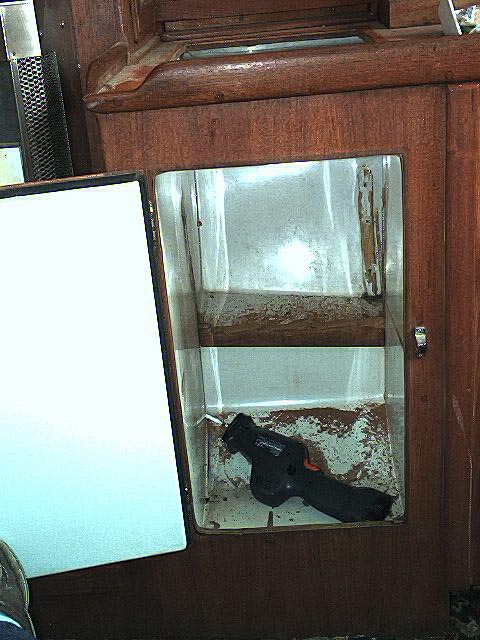
This
is a view of the old parts being taken out.
Next I cleaned out all the old, dead foam insulation.
Then came a lot more planning. I took the Norcold unit apart and inspected how it was assembled (as it was an old and bargain unit, NO warrantee to worry about!). I measured and found that it would JUST fit through the existing front door. I also had to make a plywood “L” frame to hold the parts just as they were in the old metal case.
The
new plywood "L" frame.
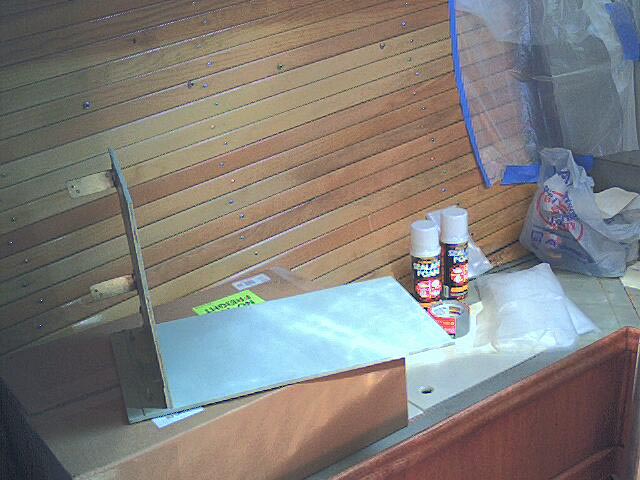
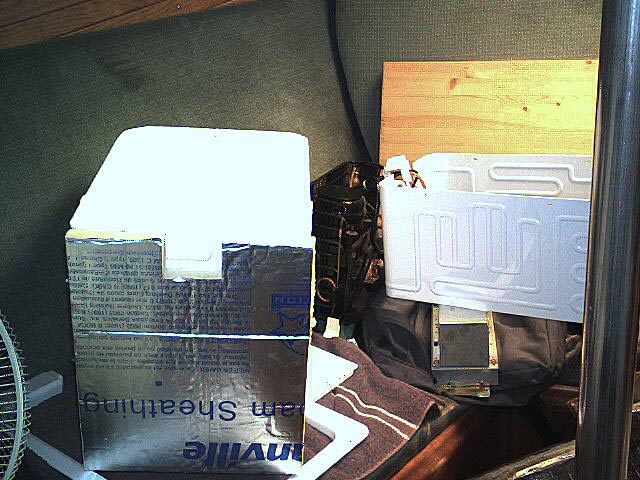
Next I looked around to find insulation to make it work at least as well as it did in the original box. As it was, it only had about 1 to 1.5 inches of pour-in insulation. I did not think this would do at all for long distance cruising in tropical waters with only a 300 AH house battery bank. All that I have read in the past regarding an icebox on a boat said; “insulation, insulation, insulation!” I found a number of places to get “Super Insulation”. It comes in everything from R-20 to R-50 per inch of thickness. I found prices (for the amount I needed, 6 pieces) from between $300.00 to over $1500.00. I chose to go directly to a manufacturer. Advantek helped me a LOT and was VERY good about working with me on this small project The vacuum insulation panels (VIP) supplied are R-30 and have a 15-year minimum life expectancy.
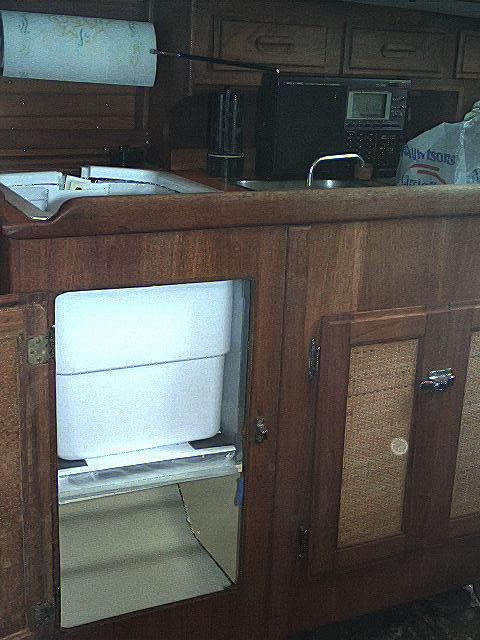
As I was looking for the insulation I decided on how to install the unit. I built a shelf in the locker that was held in place by 4 screws. They were mounted under the shelf, two at the front and two at the back. By mounting it this way, I could remove the two front screws and the shelf would pivot on the back two and lower in the front giving a lot of access to the compartment.
Shelf
down. 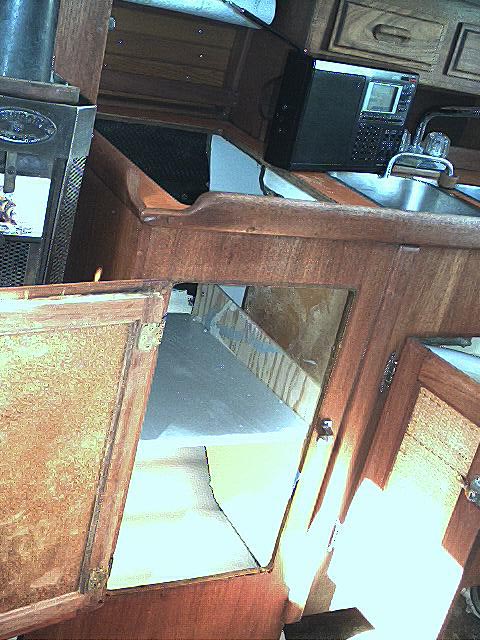
Shelf up.
I then had to cut the top of the old plastic freezer compartment off as it has the lip on it that fits over the top opening. This lip would not fit through the front ice box door.
With this done. I bought a 4 X 8 foot sheet of house foam insulation from Home Depot for about $8.00. I then reassembled the freezer parts on the “L” frame with the house insulation cut to the size and shape I needed. Once this was done, I did a temporary install of the unit in the cabinet just as I planned to have it when finished. In this way, I checked that everything would fit and work!
The home insulation cut to size as a pattern.
I then removed it from the cabinet, and removed the home insulation. I sent the insulation off to Advantek as a template for the exact size needed. I then painted the plywood “L” with bilge paint to preserve it. I also painted the shelf and inside of the cabinet to match the rest of the boat. At this time I also cut out the back of the cabinet directly under the sinks to gain entrance to the part of the ice box that I did not gut out of the boat. This gained us an expanded storage area that was not usable before!
Back
of sink area with cut out.
Once we received the “VIP” Super insulation panels back from Gary, I covered each one in a thick plastic tarp to protect them. They are fragile and can NOT be punctured if they are to maintain the R-30 rating. They depend on a vacuum inside to work. I then re-assembled all of the parts back together on the “L”.
The following few photos shows the instillation process.

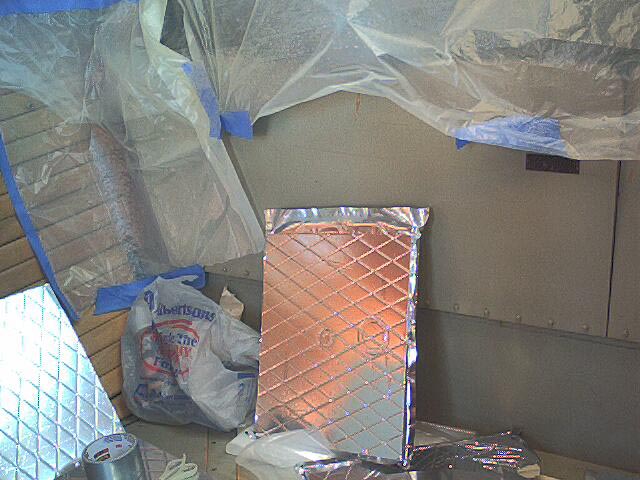
This is the VIP. I covered it in another coat of plastic
sheeting. 
I Then ran the 12 volt and 110 volt wires behind the unit into my
electrical bay of the engine space. I had pre-wired a circuit breaker
on a new panel. I then tested the system and WOW! It worked GREAT.
With shore power the unit does not draw off the batteries at all. As
soon as I drop shore power the unit automatically switches to 12 Volt
without so much as a sputter! 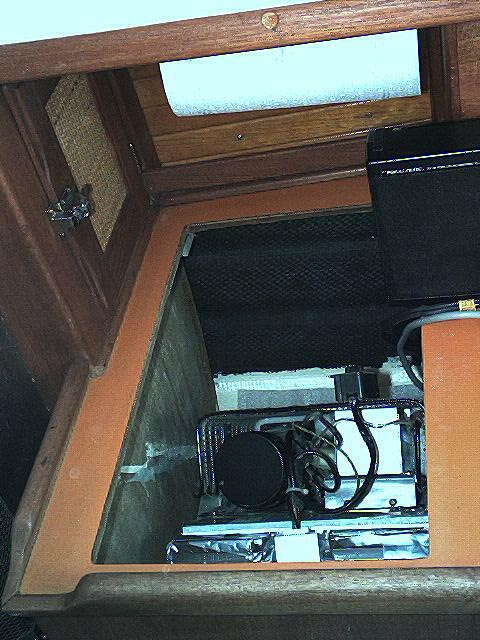
Now, I picked up 4 cans of spray in foam and a few feet of
aquarium hose to use to get it into tight spaces not reachable with
the short tube that comes with the can. We first squirted the foam
between the cabinet sides and the side VIP panels to make sure they
moved toward the inside of the unit. I let that harden for a day. I
then put the foam in all the corners to insure all areas where the
square VIP panels came together were sealed.
We then took the plastic freezer compartment lip that had been cut
off previously, and mounted it on top of the counter with the inside
lined up with the bottom and sealed it in place with a lot of
silicone sealant. 
We next made a new top for the unit. We started by using laminated pine and plywood. We laminated a one quarter inch of plywood to the bottom of the pine. I then cut this to size to fit the top of the complete unit. I turned this so the plywood was up and used the Roto-Zip to make a seal grove the same size as the one in the old metal top. I removed the plastic cover from the inside of the old top and fastened to the underside of the new top to hold the seal in place. I also removed the hinge from the old top.
Once I put this together, but before I finished, I set this in place on the unit. With it in place I found we could not open the drying cabinet door that sits just forward of the top. The new top was too thick. DRAT!
A few days later we were in the local grocery store. It was not long before Thanksgiving. They had a large display of all the goodies needed to serve up a big bird. As we were looking at the display one of the items, a cutting board, looked familiar. Upon close inspection, it was the size we needed, 14 inches by 20 inches. And, it was only about three quarter inch thick. Not the 1+ inch of the old board we made. So, we purchased it. We then mounted the same inside plastic with the seal groove and the last 8 by 10 inch piece of super insulation to it.
We then mounted a small slab of the laminated pine to the back of
the unit with a vent mounted in it and a hole with the control unit
mounted in it also. We attached the hinge parts from the old lid.
And, WOW, it was ready! 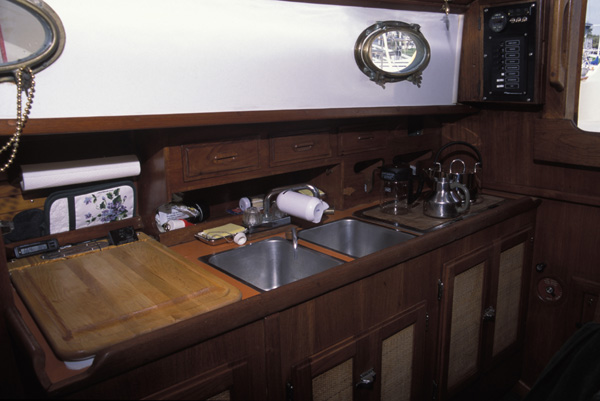
An interesting note, when we were using the Norcold in its original case, using the cigarette lighter cable that came with the unit, it would draw 3.9 to 4.0 Amps of power when running on 12 volts. In the catalog it states it draws 3.1 Amps when running. Now that I have directly wired it into our system, using the same cable with the end cut off and wires connected directly, its drawing 2.9 to 3.0 Amps when running! That's a lot of savings! All of this information taken from our “Link 10” power monitor.
If I had it to do over?
I think that if we were not planning to go off-shore, and into tropical waters, I would have built a shelf where the ice box was, bought the same type of unit, and just strapped it in place and used it that way. New units like the Norcold we bought can now be purchased for a lot less than our unit's list price. They also come in more sizes. They are made by Engel, and you can see them at: http://www.i-m-d.com/engel/.
I have talked to a lot of people who are, and have been cruising. If you are going to tropical water, and do not have a huge battery set, the Super Insulation is a MUST!
I need to add a note here. We took Guenevere over to the Pacific Sail Expo, West, for a week (April 02). When we pulled dock power from the boat the system switched over to battery power. As a test, when we got to the guest dock at Oakland Yacht Club, we did not plug into power. I also turned down the freezer to the refrigerator setting. It was a bit over 4 days (THAT IS CORRECT OVER 96 hours) before the unit turned on. This insulation works!